Intro
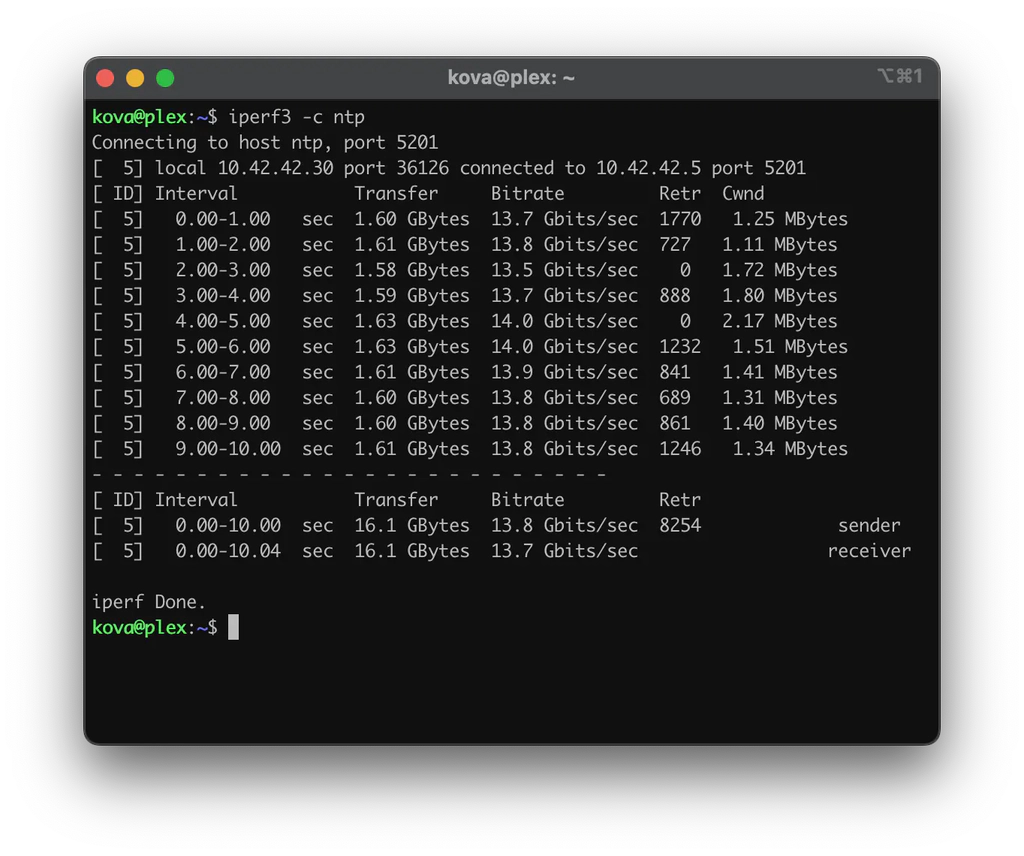
In the quest to get more performance out of my inter-vm communication, I stumbled upon SR-IOV and virtual functions. I then purchased a 10gbe X540-T2 from a Chinese seller on eBay making sure to get one with a fan, as reports of this specific card say it runs quite hot. After setting everything up, I increased my network performance from 2.5gbps on a vSwitch to 14gbps with virtual function passthrough.
Pre-requisites
Before proceeding, make sure to enable IOMMU by editing /etc/default/grub and replacing the GUB_CMDLINE_LINUX_DEFAULT lines as follows:
GRUB_CMDLINE_LINUX_DEFAULT="quiet intel_iommu=on iommu=pt"Once the edit is in place, run the command:
update grubNow, you have to enable some VFIO modules by editing the file /etc/modules and adding these lines at the end of the file:
vfio
vfio_iommu_type1
vfio_pci
vfio_virqfd
To make sure these modules are loaded on the next boot you have to issue the command:
update-initramfs -u -k allAll that is left is to reboot the system to make sure IOMMU and corresponding VFIO modules are enabled.
Testing SR-IOV
Before issuing the commands to enable SR-IOV, you need to find out which network interfaces are associated with the network card. There are several approaches to this, including using the web GUI. In my case, I just issued the command:
dmesg | grep ethThen, I looked for lines that resemble the following:
[    4.602387] ixgbe 0000:5f:00.0 ens5f0: renamed from eth0
[    4.686386] ixgbe 0000:5f:00.1 ens5f1: renamed from eth1
An easy way to test out SR-IOV is to issue the command:
echo N > /sys/class/net/<NIC>/device/sriov_numvfsIn my case, the command would look something like:
echo 2 > /sys/class/net/ens5f1/device/sriov_numvfsTo make sure this is working, you can issue ip link show NIC and if everything is working as it should the output should be something similar to this:
root@pve:~# ip link show ens5f1
5: ens5f1: <BROADCAST,MULTICAST,UP,LOWER_UP> mtu 9000 qdisc mq state UP mode DEFAULT group default qlen 1000
 link/ether XX:XX:XX:XX:XX:XX brd ff:ff:ff:ff:ff:ff
 vf 0     link/ether 00:00:00:00:00:00 brd ff:ff:ff:ff:ff:ff, spoof checking on, link-state auto, trust off, query_rss off
 vf 1     link/ether 00:00:00:00:00:00 brd ff:ff:ff:ff:ff:ff, spoof checking on, link-state auto, trust off, query_rss off
 altname enp95s0f1
Automating the virtual function generation
The changes performed in the previous step are not saved across reboots. To circumvent this, you can create a systemd service that runs on boot and tells the system to create the virtual functions as well as assign a MAC address to them. You need to create and edit the file /etc/systemd/system/sriov_nic.service. It should contain something similar to:
[Unit]
Description=Enables SR-IOV and assigns MAC Addresses to the virtual functions

[Service]
Type=oneshot
ExecStart=/usr/bin/bash -c '/usr/bin/echo 2 > /sys/class/net/ens5f1/device/sriov_numvfs'

ExecStart=/usr/bin/bash -c '/usr/bin/ip link set ens5f1 vf 0 mac 82:ea:27:28:e8:d5'
ExecStart=/usr/bin/bash -c '/usr/bin/ip link set ens5f1 vf 1 mac 6e:e2:6a:a8:99:64'

[Install]
WantedBy=multi-user.target
After the file is created, you need to run systemctl daemon-reload and then systemctl enable --now sriov_nic to start the service at every boot."
Autostarting the Network Cards
It’s important to note that the physical NIC needs to be set to autostart; otherwise, the creation of virtual functions will fail. To do this navigate to the web GUI and under network, click edit on the appropriate card, tick the box autostart, and click on ok to apply the changes.
Assign Virtual Functions to VMs
To assign the virtual functions to the VMs, you first need to blacklist the driver so that the host does not take control of them. To do this you need to edit /etc/modprobe.d/pve-blacklist.conf and add the following line at the end of the file:
blacklist ixgbevfThen you have to run update-initramfs -u -k all to make sure the changes are applied on every boot.
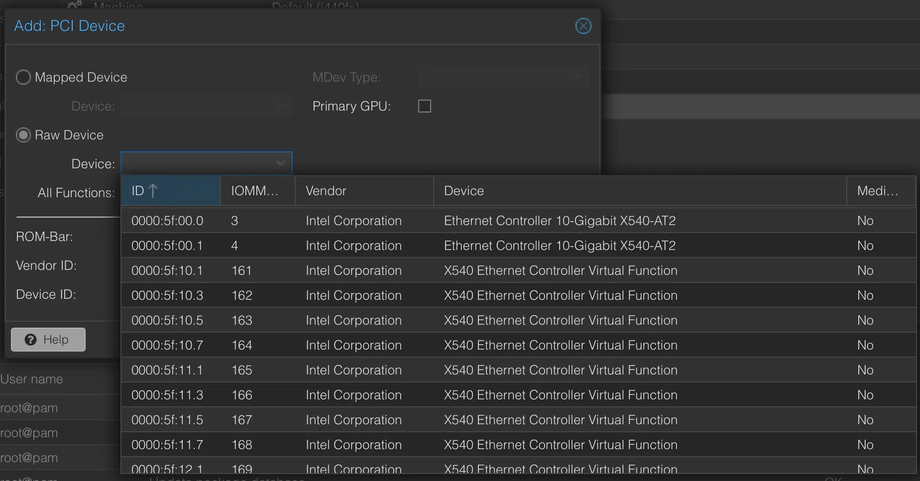
Next, proceed to your chosen VM, and click on hardware -> Add -> PCI Device. Here, click on Raw Device and select a virtual function. Make sure that the options ROM-Bar is selected and PCI-Express is unselected.

Windows hosts
In my case, the network card was not automatically detected by my Windows Server 2019 VM. I had to download the appropriate drivers for my setup, which can be found here.
Done!
Once everything is set up, you will be able to benefit from network hardware acceleration!
