Intro
I’m hosting ERPNext and Nextcloud for my family. Since these services contain more sensitive data, I wanted an extra layer of protection that limits access to approved devices without having to manage a VPN or keep track of a dynamic IP whitelist.
The solution I landed on was mTLS (client certificate authentication), where the reverse proxy requests the client to present a valid certificate signed by an approved CA. This post shows exactly how I set it up on pfSense 2.7.2 using HAProxy-devel 0.63_2.
Create an Internal (self-signed) Certificate Authority
Navigate to System -> Certificates -> Authorities -> Add.
Create an internal Certificate Authority. This CA will be used to sign the client certs that are allowed to access mTLS-protected frontends.

Generate a client certificate
Navigate to System -> Certificates -> Certificates -> Add/Sign.
Create a new internal certificate and select the CA you created in the previous step. This certificate will be installed on the client devices that you want to allow through.

I recommend creating one client certificate per device/user for more granular control. If multiple devices share the same certificate, revoking it means having to issue a new one and reinstall it everywhere.
Export it as PKCS#12
Export the certificate as PKCS#12 (this includes the private key). This is the file you’ll import into your client devices. Keep this safe as anyone with this file can authenticate.
Create a backend for your app
Navigate to Services -> HAProxy -> Backend -> Add.
- Name:
nextcloud
Under Server list, add your internal server:
- Name:
nextcloud - Forward to:
Address + Port - Address: the internal server IP
- Port: the internal server port
- Encrypt:
noif you terminate TLS at HAProxy

Create a shared frontend
Navigate to Services->HAProxy->Frontend->Add.
Create a frontend that will act as the entry point. This will be the primary frontend that other frontends attach to.
- Name:
shared_frontend - Listen address:
WAN address (IPv4) - Port:
443 - SSL Offloading: enabled
- Type:
http / https (offloading)

Advanced settings
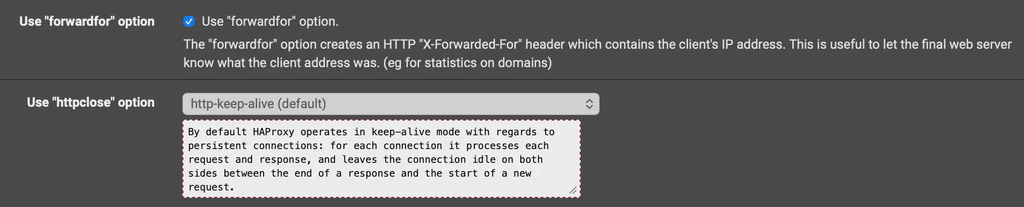
- Check Use “forwardfor” option
- Set httpclose to
http-keep-alive
SSL Offloading
This shared frontend should present your wildcard certificate.
- SNI filter:
* - Certificate: select your wildcard cert
- Enable:
- Add ACL for certificate CommonName
- Add ACL for certificate Subject Alternative Names

Create a non-mTLS frontend
Navigate to Services->HAProxy->Frontend->Add.
Create a frontend attached to the shared frontend. This frontend will just do regular routing to backends. In most cases you only need to add ACLs and Actions here, since SSL settings are inherited from the shared_frontend.
- Name:
exposed - Check Shared Frontend
- Primary Frontend: select
shared_frontend - http

Access Control Lists
Add an ACL rule:
- Name:
photos - Expression:
Host matches: - Value:
photos.mydomain.com

Actions
Add an action:
- Action:
Use Backend - Condition acl names:
photos - Backend:
photos_backend

Create an mTLS-protected frontend
Navigate to Services->HAProxy->Frontend->Add.
Create a frontend attached to the shared frontend. This frontend enforces client certificates before routing to the backend.
- Name:
exposed_mtls - Check Shared Frontend
- Primary Frontend: select
shared_frontend - http

Access Control Lists
Add an ACL rule:
- Name:
next - Expression:
Host matches: - Value:
next.mydomain.com

Actions
Add an action:
- Action:
Use Backend - Condition acl names:
next - Backend:
nextcloud

SSL Offloading
Under SSL Offloading:
It is important to explicitly list your domain names in the SNI filter. In my testing, a catch-all * did not work on the mTLS frontend as it would not prompt for a client certificate.
- SNI filter:
next.mydomain.com app2.mydomain.com app3.mydomain.com... - Certificate: your wildcard cert (same as the shared frontend)
- Enable:
- Add ACL for certificate CommonName
- Add ACL for certificate Subject Alternative Names

Client certificate enforcement
Under SSL Offloading - client certificate:
- Client verification CA certificate: select the internal CA created earlier
This is the setting that forces the browser/device to present a valid client certificate.

Final result
Your frontends list should look like this:

Restart HAProxy
Restart the HAProxy service to apply everything.
Install the client certificate and access the protected frontend
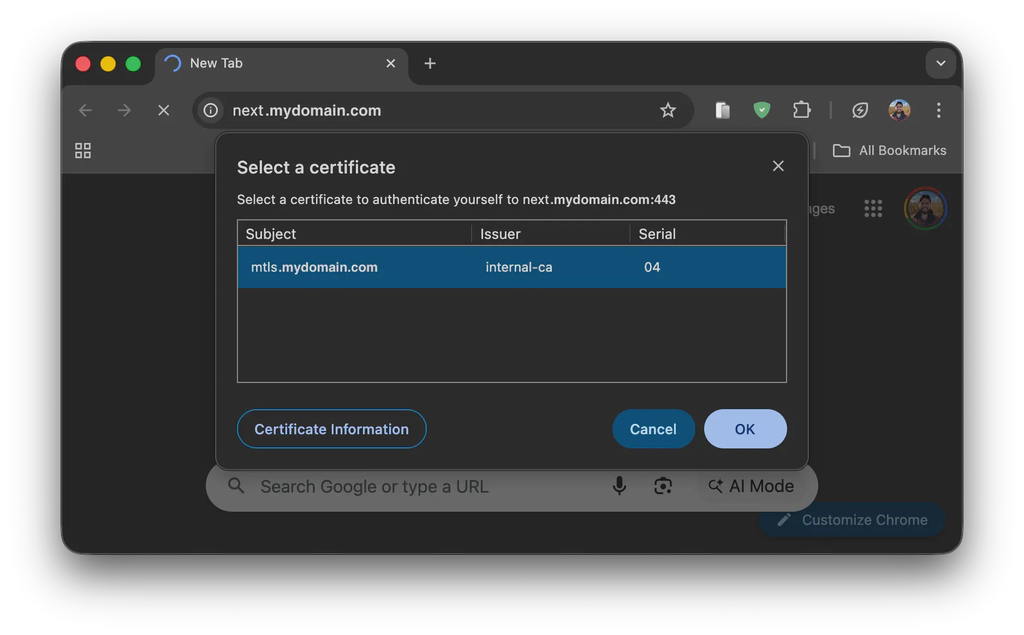
Copy the exported certificate to your client devices and install it. Then, navigate to the protected frontend and it should prompt a certificate selection like the cover image in this blog post. If no certificates are available, it means that the certificate was not installed properly.
Done!
You now have the ability to protect subdomains with mTLS.