Intro
I’ve been eyeing GL.iNet’s compact travel routers for a while, so when they offered to send me a Mango 2 (GL-MG1300) unit to review, I jumped at the chance to run it through my homelab. In this post, I cover its performance, ease of use, and practical homelab deployment scenarios.
Disclaimer: GL.iNet sent me this unit for review, but all opinions, benchmarks, and configurations are entirely my own.
Pre-order Notice: The Mango 2 is currently up for pre-order for $56 CAD on the official GL.iNet store.
Spoiler alert: it’s a great little device.
The Hardware
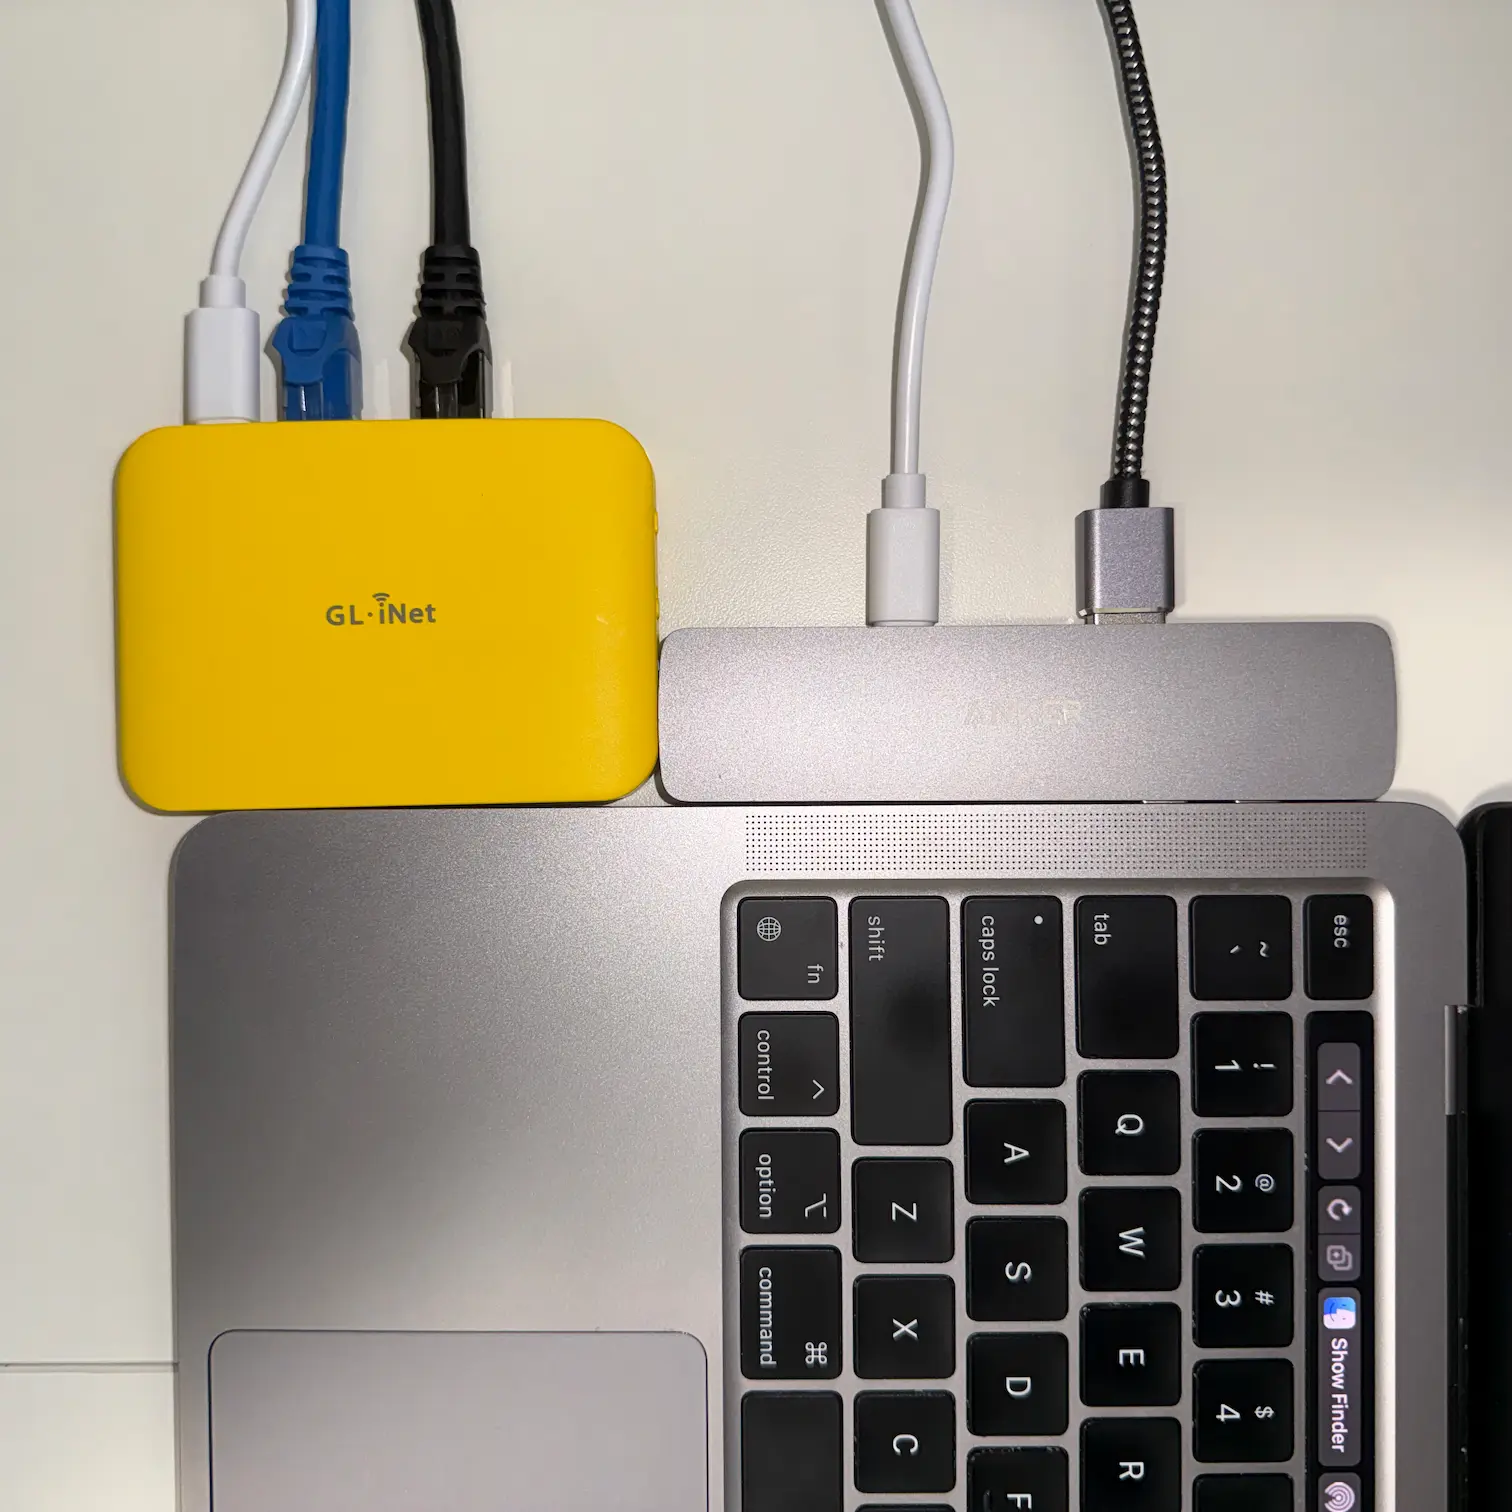
Mango 2 is tiny, measuring 89x63x15 mm and weighing a mere 100 g. Like its predecessor, it sports a yellow plastic shell that feels nice in your hands. I don’t have a first-gen Mango to compare, but the specs on paper show a big jump:
| Spec | Mango 1 (GL-MT300N-V2) | Mango 2 (GL-MG1300) |
|---|---|---|
| Wi-Fi | 2.4 GHz only (300 Mbps, 802.11n) | Dual-band AC1300 (400 Mbps 2.4G + 866 Mbps 5G) |
| Ethernet Ports | 2x 100 Mbps (Fast Ethernet) | 2x 10/100/1000 Mbps (Gigabit) |
| Power | Micro-USB (5V/1A) | USB-C (5V/2A) |
| VPN | WireGuard / OpenVPN | WireGuard / OpenVPN / Tailscale / GoodCloud |
| Cellular Support | USB-A tethering | USB-C modem / smartphone tethering |
| Firmware | OpenWrt 18/19 | OpenWrt 21/23 + GL.iNet 4.x + LuCI |
At an expected retail price of ~$72 CAD (~$50 USD), there is virtually nothing on the market in this form factor that provides dual Gigabit ports, dual-band AC, and two USB-C ports (one for power delivery and another for accessories).
The Software
GL.iNet uses an in-house build of OpenWrt (v22.03.4 at the time of writing), an open-source Linux-based operating system designed for routers. Most manufacturers fork OpenWrt but then lock it down, restricting system access. GL.iNet does the exact opposite, keeping root access out of the box, allowing full system access to things like opkg for installing Linux packages, and even the ability to hook into internal daemons (more on that later).
The custom web GUI is clean, responsive, and works great on mobile devices. The menu options change slightly depending on the selected mode as the Router mode opens up more networking options than AP mode.
Where it truly shines over a traditional router interface is in travel and edge networking. You get effortless one-click Wi-Fi repeating (including captive portal handling to bypass limits), multi-WAN failover with USB smartphone tethering, and a complete VPN suite (WireGuard, Tailscale, and OpenVPN with policy-based routing). You can also install “Plug-Ins” (a.k.a packages served by opkg) directly from the frontend without touching a terminal. If you ever outgrow their front-end, native LuCI is still accessible right under the advanced settings menu.
While testing, I received a firmware update notification. The update took about 5 minutes and, besides pressing “update,” was entirely hands-off.
All in all, you get the convenience of a traditional router when you just need things to work, paired with the full power of Linux when you want to tinker, making this an obvious choice for hobbyists.
Benchmarks & Performance
Before diving into use cases, let’s address the elephant in the room: how does this 5W router actually perform?
1. Local Network Throughput (iperf3)
To see what the hardware can actually push without internet bottlenecks, I ran iperf3 against a VM on my LAN. All tests were run from my laptop.
A. Wired Gigabit Ethernet (LAN to LAN)
To rule out adapter bottlenecks, I used a 2.5GbE NIC connected via USB-C to my MacBook.

- Upload speed:
943 Mbps - Download Speed:
941 Mbps
It completely saturates line-rate Gigabit with zero packet loss or hiccups.
B. 5 GHz Wi-Fi (802.11ac)

- Upload speed:
518 Mbps - Download Speed:
513 Mbps
Hitting over 500 Mbps throughput from a router the size of a deck of cards with internal antennas is pretty impressive.
C. 2.4 GHz Wi-Fi (802.11n)

- Upload speed:
62.7 Mbps - Download speed:
60.9 Mbps
As expected for 2.4 GHz, speeds sit around 61-63 Mbps. That is more than enough for microcontrollers, sensors, and smart plugs.
2. Wi-Fi Range & Speed Comparison: Bell Home Hub vs. Mango 2
The whole point of a wireless router is, well, wireless communication. I benchmarked Mango 2 against Bell’s Home Hub 4000. It’s a David vs. Goliath matchup, but still a useful reference point. I conducted these tests at different distances using my phone and the speedtest.net app.
| Distance | Bell Home Hub (5 GHz) | Mango 2 (5 GHz) | Mango 2 (2.4 GHz) |
|---|---|---|---|
| Next to Router | 1307 Mbps down / 1064 Mbps up (7 ms ping, 17/16 ms loaded) | 422 Mbps down / 129 Mbps up (8 ms ping, 37/36 ms loaded) | 57.0 Mbps down / 59.7 Mbps up (9 ms ping, 47/305 ms loaded) |
| 20 Feet | 1055 Mbps down / 511 Mbps up (6 ms ping, 15/47 ms loaded) | 330 Mbps down / 137 Mbps up (7 ms ping, 44/113 ms loaded) | 13.8 Mbps down / 5.78 Mbps up (8 ms ping, 132/2654 ms loaded) |
| 40 Feet | 238 Mbps down / 138 Mbps up (7 ms ping, 115/161 ms loaded) | 123 Mbps down / 74.6 Mbps up (8 ms ping, 45/347 ms loaded) | 8.59 Mbps down / 0.80 Mbps up (9 ms ping, 267/3000 ms loaded) |
3. Smartphone USB Tethering
This is one of the key features for travel routers in general. If you are on the road, you can connect your smartphone to Mango 2 and share your internet with multiple devices.

I tested two ways:
- Direct phone Wi-Fi hotspot to my laptop
- Phone USB-C tethered into Mango 2, with the laptop connected to Mango 2 over Wi-Fi
| Connection Mode | Download | Upload | Idle Ping | Loaded Latency (Down / Up) |
|---|---|---|---|---|
| Direct Phone Hotspot | 78.07 Mbps | 2.03 Mbps | 71 ms | 565 ms / 511 ms |
| Mango 2 USB Tethered | 76.00 Mbps | 5.56 Mbps | 69 ms | 485 ms / 619 ms |
In my testing, the difference between the two was minimal. So why bother with tethering at all?
The real value comes down to the flexibility of the OS. You can, for example, configure an automatic connection to a VPN the instant Mango 2 detects an internet connection from your tethered phone. Every connected device gets encryption and routing without configuring VPN profiles individually.
It also enables emergency fail-over. If your home internet suddenly cuts out, you don’t need to reconfigure anything. You can plug your phone into Mango 2, and instantly restore internet connectivity to your devices.
I suspect that Mango 2 would outshine any phone hotspot with multiple clients connected. Not to mention that running a Wi-Fi hotspot turns modern smartphones into hand-warmers, throttling performance and chugging battery life.
With the benchmark numbers out of the way, here’s how it actually handles real-world travel and homelab workflows.
Practical Use Cases
1. On the Go
Mango 2 sips electricity, so you aren’t tied to wall outlets. Plug it into a power bank and work for hours, or power it straight from your laptop’s USB-C port.

Using the GL.iNet mobile app or web portal, you can connect Mango 2 to any public Wi-Fi in repeater mode and accept the captive portal terms once. You can then connect all your devices to Mango 2 without re-accepting terms on each one. If a hotel charges for internet per device or caps you at one or two connections, this bypasses it completely; the hotel network only ever sees a single device.
Mango 2 can be configured to bring up a VPN tunnel as soon as internet access is available, encrypting traffic for everything behind it. The physical switch on the side can be set to arm or disarm the VPN on demand.
Since you have full OpenWrt access under the hood, you can add your own custom scripts like a lightweight watchdog service that alternates the onboard LEDs between white and blue whenever the VPN drops or hasn’t connected yet.
2. Isolated IoT Sandbox (VLANs & Multi-SSID)
With 802.1Q VLAN support and robust firewall capabilities under the hood, Mango 2 doesn’t have to be just a travel gadget. In a homelab, it makes an inexpensive, low-power tool for segmenting your network.
Through LuCI, you can define multiple SSIDs on the same physical radio. That means you can broadcast your primary Wi-Fi alongside an isolated IoT SSID and a separate guest network simultaneously. You can assign each SSID to its own firewall zone and subnet so smart-home gadgets can’t talk to your personal laptops or NAS, and even apply bandwidth shaping (SQM) to keep chatty devices from hogging your bandwidth.
If your homelab is a bit fancier with managed switches and a dedicated firewall, you can flip Mango 2 into Access Point mode. By tagging each SSID, Mango 2 relays all that tagged traffic back over to your core switch or router, letting your main setup handle DHCP, routing, and firewall rules.
3. Real-Time Connection Alerts via ntfy.sh
My previous ISP’s router had the ability to send notifications whenever new devices joined the network. I thought that was a great feature and wanted to replicate it on my own setup. Because Mango 2 runs OpenWrt under the hood, this is straightforward to implement leveraging ntfy.
If you run Mango 2 in Router mode, this is a trivial 5-line script hooking into local DHCP leases (/etc/hotplug.d/dhcp/). But when running in Access Point (AP) mode bridged to your network, dnsmasq is disabled.
The clean solution in AP mode is to hook directly into hostapd, the daemon managing the MediaTek Wi-Fi radios (wlan0 for 2.4 GHz, wlan1 for 5 GHz). The moment any device associates with the Wi-Fi, hostapd fires an AP-STA-CONNECTED event.
A. The Wi-Fi Event Hook (/usr/bin/on_wifi_event.sh)
Because Mango 2 acts as a Layer 2 bridge in AP mode, the kernel doesn’t route client packets directly. Fortunately, GL.iNet’s built-in gl-clients daemon passively snoops bridged Layer 2 traffic, tracking both client IP addresses and hostnames.
By waiting two seconds after association for the client to complete its DHCP handshake with your upstream router, we can query gl-clients directly:
cat << 'EOF' > /usr/bin/on_wifi_event.sh
#!/bin/sh
# /usr/bin/on_wifi_event.sh - hostapd_cli action hook for ntfy push alerts
IFACE="$1" ACTION="$2" MAC="$3"

# Fast exit: drop disconnects and probe events immediately
[ "$ACTION" = "AP-STA-CONNECTED" ] || exit 0

NTFY_URL="${NTFY_URL:-https://ntfy.sh/your_secret_topic}"
NTFY_TOKEN="${NTFY_TOKEN:-}"

(
    # Wait 2 seconds for client to finish DHCP handshake with upstream router
    sleep 2
    MAC_UPPER=$(echo "$MAC" | tr 'a-z' 'A-Z')

    # Query GL.iNet's L2 snooper for IP and device name
    CLIENT_INFO=$(ubus call gl-clients list 2>/dev/null)
    IP=$(echo "$CLIENT_INFO" | jsonfilter -e "@.clients['$MAC_UPPER'].ip" 2>/dev/null)
    HOST=$(echo "$CLIENT_INFO" | jsonfilter -e "@.clients['$MAC_UPPER'].name" 2>/dev/null)

    # Fallback to ARP table if gl-clients hasn't cached the IP yet
    [ -z "$IP" ] && IP=$(awk -v m="$MAC" 'tolower($4) == tolower(m) {print $1; exit}' /proc/net/arp)

    [ "$IFACE" = "wlan1" ] && BAND="5 GHz" || BAND="2.4 GHz"

    TITLE="[Mango 2] ${HOST:-Device} Connected"
    BODY="Device: ${HOST:-$MAC}
IP: ${IP:-Unknown}
Band: $BAND ($IFACE)"

    AUTH_HEADER=""
    [ -n "$NTFY_TOKEN" ] && AUTH_HEADER="Authorization: Bearer $NTFY_TOKEN"

    curl -s -k \
        -X POST \
        ${AUTH_HEADER:+-H "$AUTH_HEADER"} \
        -H "Title: $TITLE" \
        -H "Priority: default" \
        -d "$BODY" \
        "$NTFY_URL"
) &
EOF
Finally, make it executable chmod +x /usr/bin/on_wifi_event.sh.
B. Persistent Init Service (/etc/init.d/wifi-ntfy)
Create a persistent procd init service so both 2.4 GHz (wlan0) and 5 GHz (wlan1) radios are monitored in the background across reboots:
cat << 'EOF' > /etc/init.d/wifi-ntfy
#!/bin/sh /etc/rc.common

START=99
USE_PROCD=1

start_service() {
    # Monitor 2.4 GHz radio
    procd_open_instance "wifi-ntfy-2g"
    procd_set_param command /usr/sbin/hostapd_cli -i wlan0 -a /usr/bin/on_wifi_event.sh -r
    procd_set_param respawn
    procd_close_instance

    # Monitor 5 GHz radio
    procd_open_instance "wifi-ntfy-5g"
    procd_set_param command /usr/sbin/hostapd_cli -i wlan1 -a /usr/bin/on_wifi_event.sh -r
    procd_set_param respawn
    procd_close_instance
}
EOF
Make it executable, chmod +x /etc/init.d/wifi-ntfy. Then enable it, /etc/init.d/wifi-ntfy enable. And finally start it, /etc/init.d/wifi-ntfy start.

This can easily be expanded, for example, by adding a MAC whitelist to only notify when an unrecognized device connects.
Now, your phone notifies you with an instant alert the second (well, the second second) any client connects.
4. My Personal Setup
Folks on r/homelab know the pains of messing with other family members’ services, especially internet access. Something always goes wrong at the most inopportune times leading to debugging sessions on a Friday night.
To keep out of my girlfriend’s daily life, my lab exists behind my ISP’s router (then I can just blame Bell when something goes wrong). This meant I had to VPN to my lab’s network to access any management console, even when I was sitting right next to my server (just plug in an ethernet cable, right?).
I have now solved this with Mango 2. I plugged it directly into my homelab’s switch and flipped it into Access Point mode. It now broadcasts a dedicated SSID tied straight to my homelab subnet. With speeds pushing over 500 Mbps, I notice zero difference in daily web browsing, video streaming, or general responsiveness compared to Bell’s router.

Homelab Considerations
Does a 1 Gbps Edge Router Hinder a 2.5G / 10G Lab?
10G gear is becoming inexpensive. Take, for example, the Intel X540-T2, the current network backbone for my server. It can be found around ~$30 CAD in Aliexpress. At the same time fiber is becoming commonplace around the world. Still, many ISPs still offer sub 1 Gbps connections and often aren’t even symmetrical.
Should a router like a Mango 2 be even considered for a homelab when the backbone is easily many times faster than the edge? I think it should.
If Mango 2 is connected to a 2.5G or 10G switch on the same subnet (e.g., in AP mode or as an upstream gateway), local communication between devices on that switch happens strictly at Layer 2, via MAC addresses. A 2.5G workstation copying files to a 10G NAS or Proxmox host flows at the full 2.5 Gbps line rate, as the packets completely bypass the router. The 1 Gbps physical port on Mango 2 only becomes a speed ceiling when traffic must cross a subnet boundary (such as routing out to the WAN or crossing firewall boundaries), or if a client device is plugged directly into Mango 2’s physical Ethernet or Wi-Fi interfaces.
If your home internet subscription is 1 Gbps or less (which is the case for most households), Mango 2 will never be a bottleneck to the outside world, while your high-speed internal backbone continues to communicate at full multi-gigabit speeds.
Does It Phone Home?
GL.iNet has been around since 2010, although a relatively unknown brand in North America until very recently. A common question with routers, especially devices from lesser-known vendors, is whether they silently phone home with telemetry or usage data.
Before deploying Mango 2 on my network, I audited its network traffic through pfSense, inspecting active sockets (netstat), running processes, and the kernel connection tracking table (nf_conntrack).
It does not phone home.
Services that require third-party active connections are opt-in, as they come disabled out of the box. Things like:
- GoodCloud (
gl-cloud): GL.iNet’s remote cloud management agent is dormant (active with no instances) unless you explicitly register and bind an account in the admin panel. - Dynamic DNS (
gl_ddns): Disabled by default. - Remote Web Terminal (
rtty): Disabled by default.
The only automatic outbound traffic is a periodic ICMP ping to 1.1.1.1 (glconfig.general.track_ip), which the GL.iNet UI uses to verify WAN reachability.
If you want to turn Mango 2 into a 100% silent appliance with zero external reachability checks, you can disable the ping check directly via uci:
# Disable periodic connectivity check to 1.1.1.1
uci set glconfig.general.track_ip='0'
uci commit glconfig
Pros & Cons
What I Like
- Dual-band AC1300 and USB-C
- Full LuCI access,
opkgpackage manager, and shell scripting. - Clean privacy posture out of the box with no forced cloud dependencies.
- At ~72 CAD, nothing touches its feature set.
What Could Be Better
- Wi-Fi 6 instead of Wi-Fi 5, understandable given the budget price point, but GL.iNet’s higher-tier Beryl AX (MT3000) exists if you need AX3000 and 2.5G ports at a higher price.
Done!
In this post, I’ve only scratched the surface. I could spend a few more days just tinkering with it and creating use cases. GL.iNet has cooked up an impressive little device. For ~$72 CAD, this is a perfect addition to a homelab.
If you have any questions or other use cases you’d like me to cover, leave a comment below!