
Intro
I was tired of entering my password every time I SSH’d to my VMs, but setting up SSH keys would mean manually copying my public key to each host I wanted to connect to. I then read about one key feature of FreeIPA, which is serving as a centralized key repository.
This posed another problem: I don’t have any users in FreeIPA, as I mainly use my AD credentials (FreeIPA is one way only, and many services interact directly with Active Directory). Here’s how I generated and stored my AD user’s public key in FreeIPA, which allows me to remote into any enrolled device without manually distributing the keys.
Pre-requisite
To store public keys for AD users, an external trust must be configured. You can check out my instructions to configure that here.
Creating the key pair
To start the key pair generation, you can issue the following command:
ssh-keygen -oThis will prompt you if you want to change the default file name, ~/.ssh/id_rsa, and if you want to add a passphrase. If you choose the defaults, the public key will be located at ~/.ssh/id_rsa.pub.
Alternatively, for added security, you can use a hardware key (like a Yubikey or, in my case, a Thetis). After plugging in your key, you can issue the following command:
ssh-keygen -t ecdsa-sk -f ~/.ssh/id_ecdsa_sk -C "user@domain"This will create an ecdsa-sk key and store the private key in your FIDO authenticator. The -C option is used to specify a comment, typically the username associated with the key. Your public key will be located at ~/.ssh/id_ecdsa_sk.pub. It is highly recommended to have a secondary hardware key kept in a secure place, in case your main one gets misplaced.
After you’ve created your key pair, do a cat ~/.ssh/<key>.pub and copy the output. This text will be copied into FreeIPA in the next section.
Adding the SSH key to FreeIPA
Log in to the web portal of your FreeIPA instance as an administrator. Navigate to Identity -> ID Views -> Default Trust View.
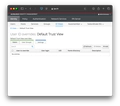
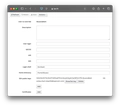
Here, you will click Add and fill out your username@domain as well as paste the previously copied key into the SSH public key field. Then click on Add. This will create your user entry.

Click on the user; it should look something like this:
Testing out the connection
Now, all that is left to do is to open a terminal and SSH to your FreeIPA-enrolled host as your user. If you use a hardware key, it will prompt you to press the button in your security key; otherwise, it will just log in automatically.